One of my pet peeves is technology that thinks it knows more than I do. Sometimes, software developers will release a new version that removes a useful feature, supposedly to enhance ease of use, but usually to advance a corporate agenda. Sometimes, they’ll streamline a key function to make it simpler for inexperienced users, at the cost of restricting flexibility for experienced users.
This pet peeve seemed to rear its ugly head when, a few years ago, I started using Roon music-management software. I appreciated Roon’s rich interface, and the abundant information it offered about albums and artists (all or most of it from AllMusic). But I couldn’t get Roon to display my music the way I wanted. Instead of showing the metadata I’d painstakingly entered for every album in my collection, Roon insisted on showing album and artist information its way. I quickly retreated to Audirvana Plus, which I’d been happily using for several years.
As it turns out, my initial frustration was wholly unjustified. With minimal effort, I’ve been able to adapt Roon to my needs. My musical tastes are a bit out of the mainstream, and that influences how I catalog my music. Hopefully, readers who want to customize Roon for their needs can learn from my experience. If you just want to see how I made Roon work for me, jump ahead to “Roon with a view.” If you’re not familiar with Roon, you’ll find the following sections helpful.
My OCD backstory
I began digitizing my music library in 2005, when I bought my first iPod. I repeated the process about eight years later, when I decided that I wanted to encode my music in a lossless format rather than the lossy AAC codec favored by iTunes. By then, I was also beginning to buy high-resolution files from such sites as HDtracks and eClassical.com, further shifting my allegiance from Apple’s iTunes store.
Downloads come with metadata already filled in. Any ripping software will go out to the Internet to find album, artist, and song information, then populate the appropriate metadata fields. But naming conventions used by download stores and music labels are haphazard. I wanted to organize my music so I could browse my digital collection easily, whether I was looking for something specific, or just wanted music to suit a particular mood or occasion.
This was complicated by the fact that I listen to classical music, as well as jazz and many genres of popular music. For jazz and pop, you can have just the album title in the Album field, and the artist name in the Artist field, then set the app to sort by album or artist. Most users will default to Artist view, so that all their Cowboy Junkies albums are grouped together.
That won’t work for classical, because the artist name is always a performer. A view that groups all performances by the Boston Symphony together is more or less useless. For classical, you want to group music by composer. I suppose it’s possible to switch between Album view for classical and Artist name for other genres, but that seems awkward.

Even if you listen to only one genre, it’s useful to edit metadata for consistency. Do you want all your Joni Mitchell albums to appear under “J” or “M”? If you choose “M,” you’ll have to make sure the artist field for all her albums reads something like “Mitchell, J.”
This is the option I followed for album titles, using the composer’s name for classical music, and the artist’s name for other genres, followed by the title of the album or composition. For surnames shared by multiple composers (Johann Sebastian Bach, and his sons Carl Philipp Emmanuel and Johann Christian, for example), I would start with the surname, followed by the initials of their given names: “Bach, J.S.,” “Bach, C.P.E.,” “Bach, J.C.,” etc. I followed the same practice for popular and jazz musicians: “Cohen, L.” for Leonard Cohen and “Cohen, A.” for his son, Adam. This naming convention led to such album titles as “Bach, J.S.: Goldberg Variations, BWV 988” and “Cohen, L.: Ten New Songs.” For classical albums, the name of the performer would appear in the Artist field. Along with album art, this made it easy to choose between Glenn Gould’s and Angela Hewitt’s rendering of the Goldbergs.
I’d also split in two classical albums containing two large compositions (say, Beethoven’s Fifth and Seventh Symphonies), by specifying different album names for each of those compositions’ tracks. I’d combine multi-disc sets devoted to a single work or concert (say, Mozart’s Don Giovanni or Keith Jarrett’s The Köln Concert) into a single album. My goal was to be able to cue up the music exactly as its creator(s) intended.
This sounds like more work than it actually was. Each time I ripped a CD or bought a download, I’d tweak the metadata to these specifications, a process that typically took a minute or two. This might seem a little obsessive-compulsive, but the result was a digital music library that worked precisely as I wanted it to. Using Audirvana, I could easily scan my 1500-plus albums and find what I wanted to hear.
Roon 101
If I was so happy with Audirvana, why would I consider installing Roon? For lots of reasons, actually, starting with the enthusiastic reviews Roon earned from the moment of its release. While most of the initial buzz focused on Roon’s interface and editorial content, I think its biggest benefit is the ability to integrate networked audio products from different brands into a single, robust ecosystem. To understand why, it helps to know a little about Roon’s architecture.
A Roon installation has three components. At the center is Roon Core, which manages your music library. That library can include music stored on the computer running Roon Core, an iTunes library on that computer, a USB drive attached to that computer, or a network drive.
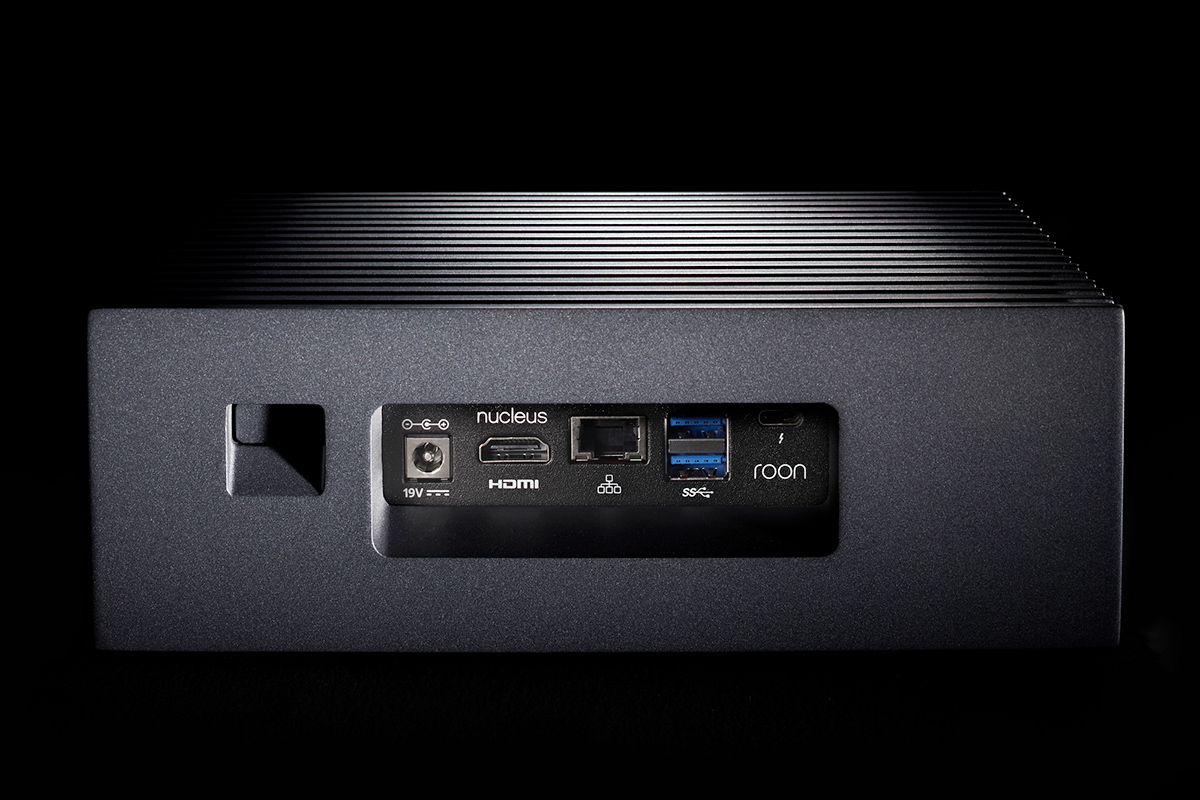
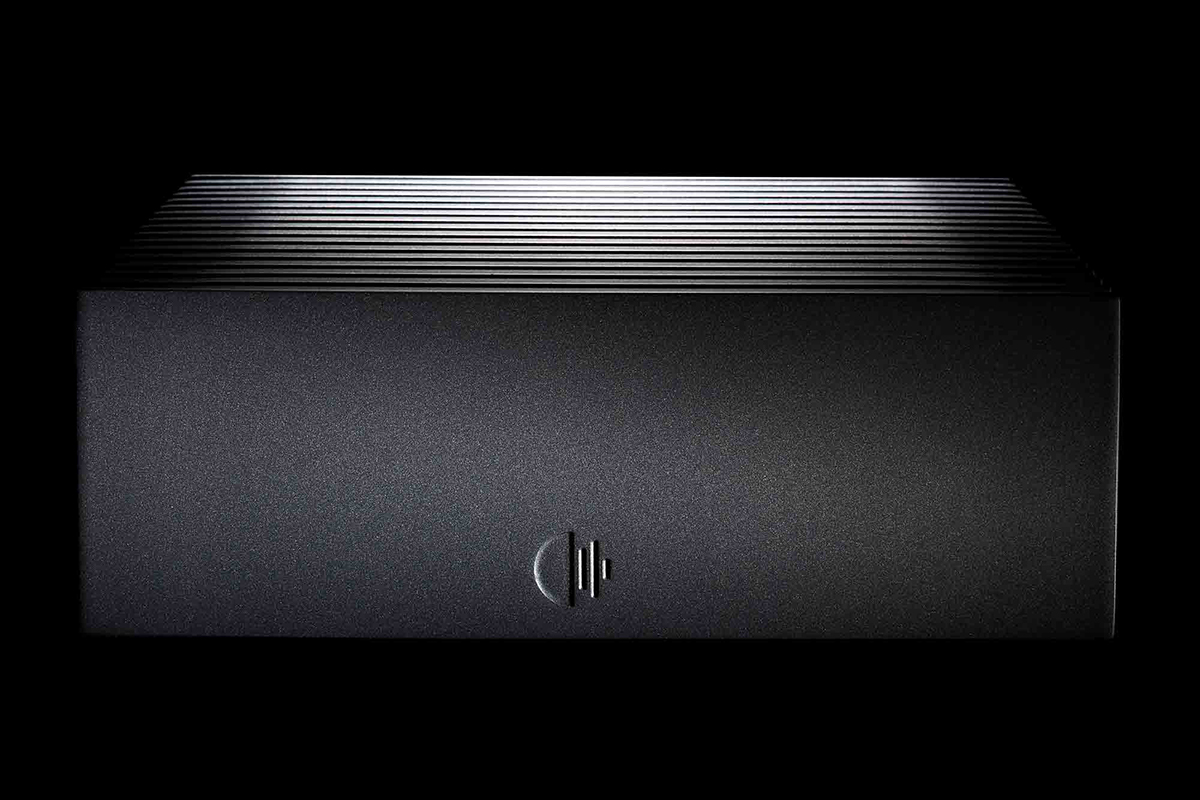 Roon offers the Nucleus server, which comes preconfigured as a Roon Core
If you’re a Tidal subscriber, Roon also integrates into your Roon library content from My Collection in your Tidal account. You can also browse Tidal from within Roon. And, following a software update released last summer, Roon can now perform MQA Core decoding in software, so that users can get hi-rez playback of Tidal Masters content, even without an MQA-capable DAC.
In late January, just before this feature went live, Roon issued a major software update that adds support for the French streaming/download service Qobuz, which will soon launch service in the US. Qobuz already has a public beta for users who want to try the service before it officially launches.
Roon Core can run on a Windows PC, a Mac, or a music server made by one of Roon’s hardware partners. You can download Roon Core for a Mac or PC directly from Roon at https://roonlabs.com/downloads.html. A 14-day trial is available. Roon-capable music servers typically come with Roon Core pre-installed, though you’ll have to acquire a license after the trial period has elapsed.
Then there are output devices. You can play music directly from the outputs of the computer on which Roon Core is installed, or from a DAC attached to that computer. Many popular DACs have been tested by Roon, so that Roon outputs audio tailored to those DACs’ capabilities. In addition, Roon can stream over a home network to many different devices, including other PCs and Macs, Roon-ready networked components from many different audio brands, and AirPlay and Chromecast devices.
Finally, there are the control devices that you use to browse and select music: a PC, Mac, Android device, or iOS device running the Roon control app. From the Roon app you can send music to any Roon-capable player on your network, or group several players together for synchronized multiroom sound.
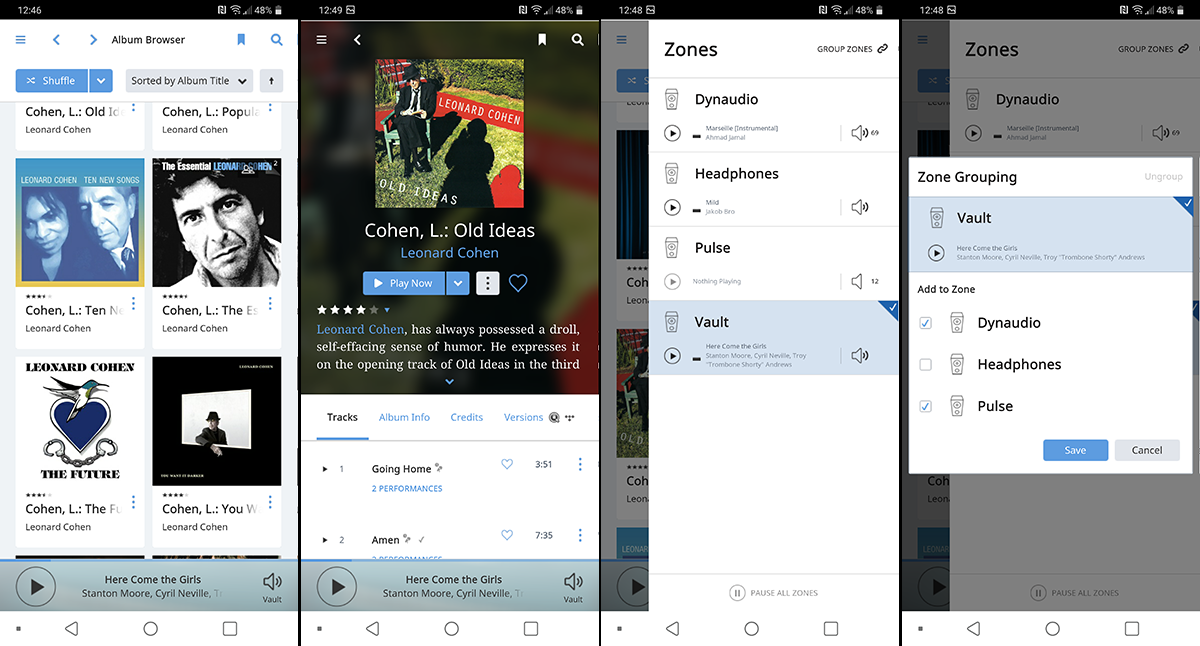
Therein lies the real power of Roon. A Roon system could include a Chromecast player connected to your TV or home-theater receiver in the rec room, a pair of KEF LSX active speakers in the master bedroom, a Bryston digital music player in the main music room, an iFi DAC-headphone amp attached to a PC in the home office, and an AirPlay speaker in a child’s bedroom. Roon could stream music to any or all of these devices, under control of an app running on a smartphone, tablet, or computer. This is but one of thousands of possible permutations.
Roon follows a subscription model. Users license Roon Core at a cost of $119 (all figures USD) annually, or $499 for a lifetime subscription. That’s the only cost. You can have as many Roon output devices (or endpoints) on a Roon system as you like, and you can run the control app on as many devices as you like.
In my product reviews, I’ve sometimes referred to Roon as “an expensive option.” Five C-notes isn’t chump change, at least not to me -- not when I can buy a lifetime license for Audirvana (an excellent player, available for both macOS and Windows 10) for $74. But for music lovers who want to create a networked music system from a diverse set of components, Roon is downright miraculous.
Roon with a view
As noted in the introduction, my initial take on Roon wasn’t so enthusiastic. When I fired up Roon for the first time, all my careful cataloging seemed to be for naught. The Sort by Album Title option showed albums by their original titles, rather than by the custom titles I’d entered. Albums that I’d split, so I could view major compositions separately, were once again merged. My pet technological peeve had struck again: Roon thought it knew more than I did about how I wanted my music organized. How dare it?
A week after I installed Roon, I got a call from Steve Silberman, Roon Labs’ affable VP of sales and marketing, asking how I liked the software. Not so much, I replied, and outlined my frustration. Silberman in turn outlined a super-simple fix for my problem: Choose Preferences from Roon’s main menu on a PC or Mac, then select the Library function. In the next screen, click the Edit button next to Import Settings. In the screen after that you’ll see a set of options for Metadata Preferences for Albums. The first of these are two buttons for Title: Prefer Roon (which is checked by default), and Prefer File. Silberman told me to select Prefer File, so that Roon would sort and display albums using the metadata tagged into my digital files rather than Roon’s metadata. After that, Roon took a minute or so to resort its database, and all was good. Roon was now cataloging my music the way I wanted it to.
There are also options for using Roon’s or your files’ metadata for album artist, release date, and other parameters for album metadata. Under Metadata preferences for tracks, lower in the same screen, is another set of buttons for choosing Roon or your own metadata for Track Title, Media (disc) Number, Track Number, etc. I left Prefer Roon checked for most of these options, as I hadn’t put much effort into track metadata, but chose Prefer File for Media Number and Track Number.

I can definitely understand why Prefer Roon is the default setting for all these metadata preferences. Many users will not have tweaked the metadata in their digital files as extensively as I have, and for them, Roon’s album and track information may well be more accurate than the metadata in the files.
Silberman then pointed out another area I could customize. Choosing the Audio option in the Settings menu displays a list of all Roon output devices: those connected to the computer running Roon Core, as well as networked components. Click the little gear icon next to any output device, and you’ll see an option called Device Setup. That will show you Roon’s default settings for that device. If the device is Roon-certified, there’s probably no need to change the settings. But you may see an Uncertified device in the list. If you’re familiar with the device’s capabilities, choose Device Setup, then enter the settings manually.
For example, as I completed this feature, Roon still showed the Bluesound Pulse 2i and Vault 2i as Uncertified. Under MQA Capabilities in the Device Setup screen, it showed both products as having No MQA Support. In fact, both components can fully unfold MQA files -- choosing Renderer Only from the dropdown menu let me enjoy full MQA decoding when streaming Tidal Masters content to these components via Roon.

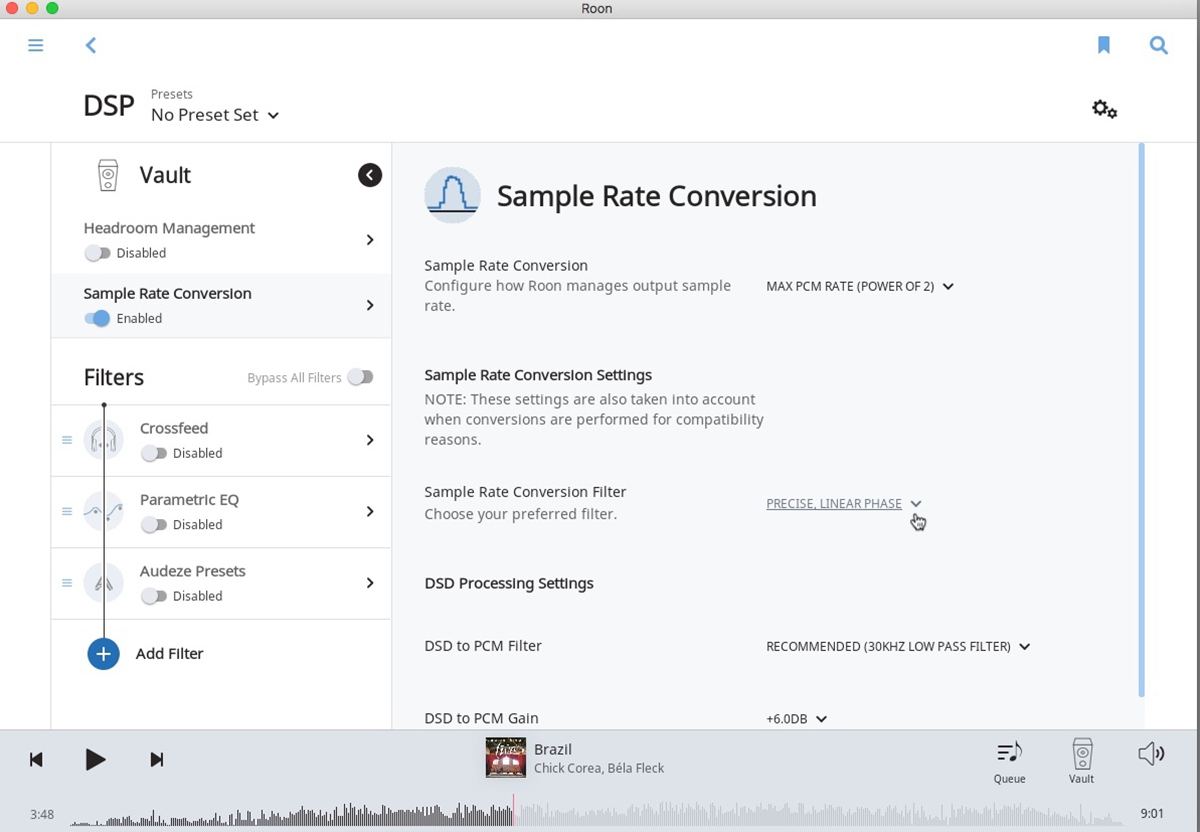
Silberman also pointed to an area that power-users can explore. In Roon Version 1.6, clicking the little speaker icon on the bottom right of the main screen reveals three options: Setup (an alternative to using the Preferences menu), Transfer (two little arrows, for transferring playback to another device), and DSP. Choosing DSP reveals functions such as Sample Rate Conversion, Crossfeed (for headphone amps), and Parametric EQ. I’ve enabled power-of-two upsampling using the Precise, Linear Phase filter, but have left the other options disabled. With these changes, my hardware was now working the way I wanted.
I was now about 90% of the way to where I wanted to be with Roon, with one lingering irritation: the way Roon merges my Tidal collection. While the albums in my own library were sorted and displayed with the album names I’d entered, they were interleaved with Tidal albums I’d put in My Collection -- and, these, of course, were sorted and displayed with Tidal’s metadata, whose album-naming conventions differ from mine. The more music I added to my Tidal Collection, the more disorganized my Roon library became. Keith Jarrett’s latest solo album showed up under L, as La Finece, whereas all my other Jarrett albums were filed under “J,” as in “Jarrett, K.: A Multitude of Angels.”
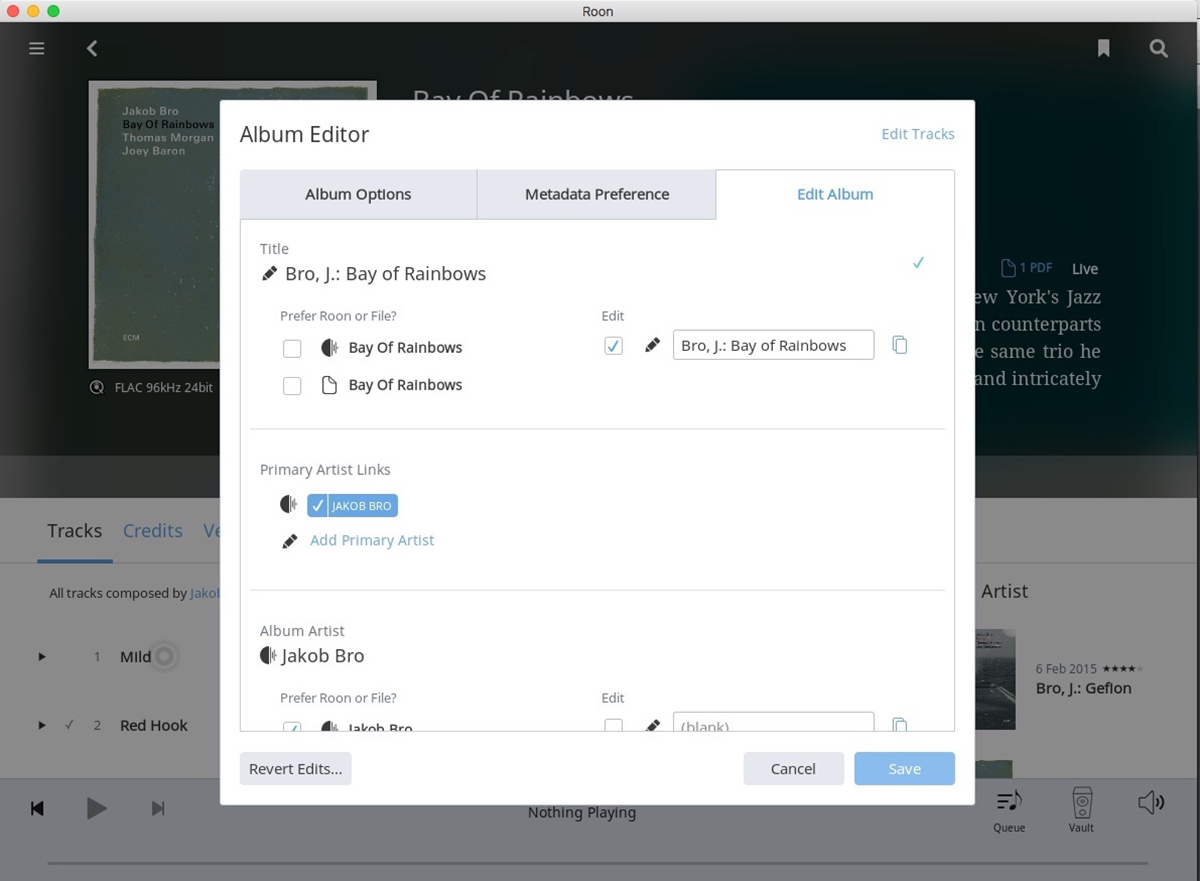
Again, there was an easy fix. In the screen that appears after you select an album in Roon, there’s a little three-dot icon for Album Options. Click it and you’ll see an Edit option, which takes you to a screen with a tab labeled Edit Album. In the next screen, you can edit the album title. This incredibly useful tool has enabled me to make the albums I’ve put in my Tidal collection follow the same naming conventions as the albums in my local library. Wonderful!
If you’re a Qobuz subscriber, Roon will interleave your Qobuz favorites with your library (and with your Tidal collection if you subscribe to both services). You can use the method described above to make your Qobuz favorites follow the same naming conventions as your local library.
Roon’s Edit Album has another useful function. Under Album Options is a button labeled “Hide Album.” I’ve used this to hide albums that show up twice in Roon -- for example, a few stragglers from my iTunes library, which I haven’t used for years. Roon lets me hide these. It also lets me hide albums in my Tidal collection that I don’t want to see in Roon. I’ve put a few albums in my Tidal collection and Qobuz favorites that are also in my local library because I want these albums to be accessible on my smartphone when I’m not at home. But at home, I want only the version in my local library to be visible in Roon. With Hide Album, I can make that happen.
With these changes, Roon delivers a perfect view of my music -- not just my local library, but the discoveries I’ve made browsing Tidal and Qobuz. All of these functions can be performed on a computer running Roon Core, or on any Roon Control device -- not only a Mac or PC, but a smartphone or tablet. You can make these tweaks while you sprawl on the couch, sipping a Chardonnay and listening to music.
As I’ve discovered, Roon is almost endlessly customizable. Its default settings give new users a comfortable way to get started, but users who want to explore more deeply can, with little effort, create a Roon of their very own.
. . . Gordon Brockhouse